這串文章是介紹從零開始寫一個 3D 繪圖引擎,會從最基本的如何在 Win32 上劃出點和線開始,一直實作到一個有上光影顏色的 3D 模組為止,材質貼圖演算法不會包括在裡面。
演算法的部分參考了不少英文的網頁,其中David Rousset 的 Tutorial series: learning how to write a 3D soft engine from scratch in C#, TypeScript or JavaScript 是我最推薦的。雖然裏面有些地方沒說清楚 ,需要讀者連結到其他地方閱讀,不過這是我找過最適合入門的教學文。如果你英文夠好且對基本電腦繪圖已經有經驗的可以直接去看他的。
就像學程式要先從如何輸出一個 Hello World 開始,寫個 3D 引擎當然要從如何在畫面上畫一個點開始。我在文章中使用的語言是 C++ (會用到 C++11 的語法),UI 相關的開發是在 Win32 平台上,要看懂這篇與接下來的幾篇文章,至少需要知道 C++ 的語法,RGB 三原色的常識,與簡單的三角函數和矩陣的概念。本篇 【0. 準備工作】要講的是如何在 Win32 上畫畫,如果打算在別的平台,像是手機或是網頁上實作,可以略過本篇。
如果在 Google 上找 “win32 draw point”,找到的教學基本上都是講如何在 Win32 上開一個視窗專案,然後利用其中的 HDC 或是 GDI/GDI+ 畫畫的方法。但是在需要大量運算和高達 30 ~ 60 fps 的 3D 引擎上,GDI 的效律很差。因此我們要開一個 byte buffer,在上面 “畫” 上東西後,直接使用 byte buffer 去替換目前畫面的作法。
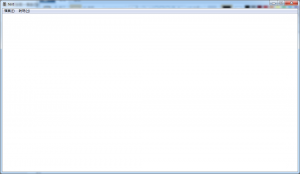 首先是安裝 Visual Studio (在這下載 免費的 Community 版本) 與建立一個 Visual C++ 的 Window Desktop 的傳統型應用程式,這二點就不詳述了。編譯並執行這個專案,會看到左邊的視窗。
接下來,我們會拿掉視窗的 Title Bar 和 Menu,並加入一個每 100 ms 會 trigger 一次的 timer 讓程式每 100 ms 刷新一次畫面。
移除 Title Bar 並加入 Timer
更改前
HWND hWnd = CreateWindowW(
    szWindowClass,
    szTitle,
    WS_OVERLAPPEDWINDOW,
    CW_USEDEFAULT, 0,
    CW_USEDEFAULT, 0,
    nullptr, nullptr,
    hInstance, nullptr);
更改後
// create a window without title bar
HWND hWnd = CreateWindowW(
    szWindowClass, szTitle,
    WS_BORDER | WS_MAXIMIZE,
    CW_USEDEFAULT, 0,
    CW_USEDEFAULT, 0,
    nullptr, nullptr,
    hInstance, nullptr);

// set a timer for every 100 millisecond
SetTimer(hWnd, 100, 100, NULL);
移除 Menu
更改前
ATOM MyRegisterClass(HINSTANCE hInstance)
{
  ...
  wcex.lpszMenuName   = MAKEINTRESOURCEW(IDC_ENGINE3D);
  ...
}
更改後
ATOM MyRegisterClass(HINSTANCE hInstance)
{
  ...
  wcex.lpszMenuName   = NULL;
  ...
}
在 WndProc 中加入 Timer 和 Paint 的處理
更改前
LRESULT CALLBACK WndProc(HWND hWnd, UINT message, WPARAM wParam, LPARAM lParam)
{
  ...
  case WM_PAINT:
  {
    PAINTSTRUCT ps;
    HDC hdc = BeginPaint(hWnd, &ps);
    // TODO: ...
    EndPaint(hWnd, &ps);
  }
  break;
  ...
}
更改後
LRESULT CALLBACK WndProc(HWND hWnd, UINT message, WPARAM wParam, LPARAM lParam)
{
  ...
  case WM_PAINT:
  {
    PAINTSTRUCT ps;
    HDC hdc = BeginPaint(hWnd, &ps);
    OnPaint(HDC hdc); // paint the window
    EndPaint(hWnd, &ps);
  }
  break;
  case WM_TIMER:
  if (wParam == 100 )
  {
    InvalidateRect(hWnd, NULL, FALSE); // update whole window every 100ms
  }
  break;
  ...
}
實作 OnPaint( HDC hdc)
VOID  OnPaint(HDC hdc)
{
  // get window's information
  BITMAP structBitmapHeader;
  memset(&structBitmapHeader, 0, sizeof(BITMAP));

  HGDIOBJ hBitmap = GetCurrentObject(hdc, OBJ_BITMAP);
  GetObject(hBitmap, sizeof(BITMAP), &structBitmapHeader);

  // window's width and height
  LONG width = structBitmapHeader.bmWidth;
  LONG height = structBitmapHeader.bmHeight;

  // bits per pixel, it should be 24 (3 bytes) or 32 (4 bytes)
  WORD bytesPerPixel = structBitmapHeader.bmBitsPixel / 8;

  // allocate pixel buffer for drawing
  //
  // NOTE: this is BAD practice, programmer should
  //       reallocate buffer only once if the window size
  //       changed
  LONG bufferSize = width * height * bytesPerPixel;
  BYTE* buffer = new BYTE[bufferSize];

  // directly draw on the buffer
  for (int i = 0; i < bufferSize; i = i + bytesPerPixel)
  {
    buffer[i] = 0;     // BLUE
    buffer[i + 1] = 0; // GREEN
    buffer[i + 2] = 0; // RED
  }

  // update the screen with buffer
  BITMAPINFOHEADER bih;
  bih.biSize = sizeof(BITMAPINFOHEADER);
  bih.biBitCount = structBitmapHeader.bmBitsPixel;
  bih.biClrImportant = 0;
  bih.biClrUsed = 0;
  bih.biCompression = BI_RGB;
  bih.biWidth = structBitmapHeader.bmWidth;
  bih.biHeight = structBitmapHeader.bmHeight;
  bih.biPlanes = 1;
  bih.biSizeImage = bufferSize;

  BITMAPINFO bi;
  bi.bmiHeader = bih;
  SetDIBitsToDevice(
    hdc, 0, 0,
    width, height,
    0, 0, 0, height,
    buffer, &bi, DIB_RGB_COLORS);

  // release buffer
  delete[] buffer;
}
關於 OnPaint( HDC hdc ) 有幾個重點。
- 上面的實作為了簡化,每次 OnPaint 時都會從新 allocate 一個 buffer,這是錯誤的做法。malloc/free 或是 new/delete 都是會拖累效能的。正確的作法是只有當 Windows 的寬或高變化時,才需要釋放並重新取得一塊 buffer,其他情況使用舊的 buffer 就好。從 github 下載的 Sample code 使用了 Singleton Pattern 去實作這一塊,有需要可以去看看。
- 個 Pixel (像素) 雖然都是 RGB Format 的,在不同版本的 Windows 上可能會有不同的大小。一般都是 4 Bytes,但也看過 3 Bytes 的,需要從 HDC 取得相關 Header 確認。
- Windows 的 HDC 或是 GDI 座標系統裏,原點是在最左上角。但在 memory buffer 中,buffer[0] 的所在位置是在左下角,或是直接說原點在左下角。
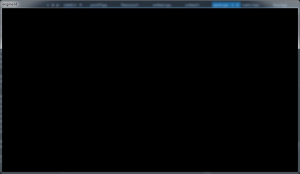
現在你看到的視窗應該長的像上圖。下一章,我們會在上面畫一個同時在 X 軸、Y 軸、Z 軸旋轉的立方體~的八個點,敬請期待。
順帶一提,本章提到的 source code 在我的 github 上也可以找到,有需要可以去看看。